I'll do these posts as I work through the scenario, proportioned for a smaller miniature army that is functionally possible to use in a reasonable length game.
A quick look at a map shows that the length of the Gettysburg field, from roughly the end of Little Round Top to the other end at Cemetery Hill is around 7000 yards. I haven't decided if the first day's battle will be included or not. For this exercise, I'll just use the 7000 yard figure.
My table is 108" ( 9 foot). So - 7000 yards/ 108" = 64.8 yards per inch. I'm comfortable enough with my historicity to round that up to 1" = 65 yards. My preferred set of rules is Field of Battle, 2nd Edition. FoB's nominal ground scale is 1" = 25 yards. The actual to game ground scale ration is 65/25, or 2.6. I'm happy to say that the real to game ground scale is somewhere around 2.5 to 3 to 1.
So, this begins to tell us what kind of game proportioning (real units to game units) we'll see. If we assume the same 2.5 to 3 to 1 scaling, we can start to see where we are.
Assume that the game unit is the game representation of the nucleus of the multiple units it represents. The multiple real units would be deployed "somewhere" around that game unit nucleus, with 2.5 to 3 times the frontage. This means we'd also have more depth than the nucleus game unit. So, if we make another assumption (never assume, or it will make an....), and say that we have something like a box of 2.5 to 3 real units wide by 2.5 to 3 real units deep roughly centered around our game nucleus unit, that means that the game unit represents something like 6.25 to 9 real units. I can live with rounding that and saying 1 game unit = 6 to 9 real units.
At the least detailed OOB level, the Army of the Potomac had around 93,000 men. The Army of Northern Virginia had around 73,000 men. Let's assume, for the sake of conversation, that the infantry present for battle (leaving out cavalry and artillery) represents around 60% of those numbers. That leaves us with around 55,000 for the AoP and 45,000 for the ANV. If we take that further, and assume that each infantry regiment is 500 men, then the AoP has 110 regiments and the ANV has 90 regiments. Are these numbers correct? I don't know. I have plenty of resources to acurrately figure this out, but quite honestly, this is for a game, not a dissertation and I just don't want to go to that level of research!
So, if you're still following along, we were looking at 1 game unit equaling 6 to 9 real units. That means that the AoP would be 110/6 to 110/9 infantry units, or somewhere between 12 and 18 infantry (game) units. Similarly, the ANV would be somewhere between 10 to 15 game units.
My ACW collection (25mm) presently has 15 Federal infantry regiments in it. Zowie! 15 units is right in the middle of the 12 to 18 unit range we're looking at above. If I follow proportions, the ANV would then have 12 infantry units or so for the game.
What does each game unit represent? Surely at the extremes, a very large brigade to a division of real troops. Does that change the game? Not in the least.
Next will be a scaling of support units (cavalry and artillery) to get that correct.
This is actually quite a bit of fun! Now its back to the painting table to work on Libyan spear units for my Carthaginian army (Pulse of Battle).
Thursday, December 20, 2012
Saturday, December 8, 2012
Proportional Scenario - Process Begins!
I've been pondering which battle I'd like to use this process (proportioning) for to set up a game. My decision - the grand daddy of US battles - Gettysburg!
Why Gettysburg?
Well....why not? Everybody knows it, its fascinating, and there is interesting terrain.
Having been part of a club game for a convention around 25 years ago that was intended to do all three days of Gettysburg in the 3 days of the convention....in real time....that at the end of day 3 of real time at the convention was still mired in day 1 of the battle representation.....I know what hassles there are in doing a 1 unit to 1 unit representation of this battle.
I'll be pondering the scaling (game unit to real units), ground scale scaling, as well as time scales.
I'm really looking forward to this!
Monday, December 3, 2012
Representational, Proportional Historical Scenarios
What do I mean by "Representational, Proportional" scenarios? A more "common" term would be "bathtubbed", although I think this concept goes way back to Featherstone, Young, and Grant.
In short, all it is about is taking an historical action and scaling it to fit your existing collection size. There are some other considerations, and I think that is the "art" in the process.
Let me blather on and explain myself.
I see multiple posts on TMP or in blogs every day about refights of the battle of XYZ, using completely historical OOB's and ratings and terrain. Except.....does anybody enjoy these? I mean - if the real battle had 74 battalions on one side vs. 63 battalions on the other - who wants to play that game? Do you have a life? Not to mention the space and abstraction issues that arise from packing all the depth exaggerated units onto the table, the sheer time to move all the figures.....yawn. Those games remind me of monster board games. They sound good in theory, but by the time you get all the pieces set up, you want to just put it away because the thought of playing has become so daunting.
The solution is to take an historical action and just scale down the action.
But wait (I hear you say) - instead of doing that, I prefer to use grand tactical scale rules, and have each unit represent a brigade, with special rules for that appropriate level of command.
Well - that works, but quite often those types of games lack the tactical flavor and decision making that players like.
I much prefer to (using horse and musket terminology) use the battalion as the game unit and still have all the tactical interplay in the game.
We regularly scale a unit internally (ie, 1 figure = 50 men), but it is much less common to scale a battle externally (ie, 1 game unit = 5, or 10, or 17 real units).
Externally scaling battles also allows compression of ground scales, as well as terrain features. If you externally scale units, you should similarly do that for towns, villages, etc. (Have you looked at how many villages you'd have to use if you did a "true" scale game in NW Europe in WW2?) I'd also propose that the ground scale could be similarly scaled.
I think I'll take on an historical battle as a Proportional game and use that for some future posts as I work through the process.
No pictures this time....just thoughts.
Sunday, December 2, 2012
Pulse of Battle Update
WooooooHoooooo! The Denver Mannings....err....Broncos are 9-3! Sweet season so far, I can hardly wait until Thursday when the next game is against the Raiders. Have I mentioned how much I dislike the Raiders?
Anyway - an update on Pulse of Battle. We played another development game last night, and it successfully cleared up a handful of lingering issues. I'm very happy with the rules, how they play, and the feel of the games. I'll be cranking away on finishing the writing.
Next game in January will be with an entirely new concept for "Follow Me!", the WW2 squad game.
Some photos from the game:


Saturday, November 3, 2012
My Armies
As I sit and create this post, I look off to my right, and see the cabinets containing the "completed" armies that I have. Unfortunately, the not-yet-started greatly outnumbers the completed. What are my armies and why do I have them?
Franco-Prussian War 1870 - Wargames Foundry figures. This is my oldest 25mm set of armies, and the first that I raised once I made the decision to solely focus on 25mm. I love this period - the full transition to breechloading rifles, much better artillery, cool uniforms. Eventually I'll return to these armies and add more infantry and artillery.
Austria, 1859/1866 - Technically, these figures (Battle Honors) are for 1859 as they're in the tunic and not the boring grey coat. But - white coats are prettier, they're my armies - so there! These little warriors do battle with the French (see above) in 1859, and also the Prussians in 1870. They exist to give the French and Prussians an enemy that they can both beat regularly. I consider this army to essentially be complete.
French Napoleonic - created around the pre-1812 uniform and flags, with a combination of Old Glory, Elite, and Wargames Foundry figures. This is one of the larger armies that I have, and it features several units of figures painted by Eric Miller, painter extraordinaire. Future plans include more cavalry.
ACW Federal - another of my favorite armies, using a combination of Old Glory, Sash and Saber, Redoubt, and Wargames Foundry. No two figures alike in the units. Considering that the ACW is my passion for reading and researching, this shouldn't be a surprise. My long term plans are to add more units, but specifically a ton of cavalry for some entirely cavalry vs. cavalry bashes.
British Napoleonic - created in the stovepipe shako with the Penninsula in mind. These are Elite and Old Glory figures. I love the red, and the Spanish and Portuguese allies. What a colorful army on the tabletop.
ACW Confederate - a wondrous mass of browns, tans, khakis, grays, and blues. Combination of Old Glory, Sash and Saber, Redoubt, Renegade, and Wargames Foundry. I love this army. No two figures alike in the units.
Austrian Napoleonic - in helmets, for 1809 and earlier. The white uniforms "pop" with the bright variety of facings and flags. This army is essentially finished, but I'll probably add both infantry and cavalry. Combination of Old Glory, Sash and Saber, and Elite.
Prussian 1814/1815 Napoleonic - I picked this army up in a sale from Eric Miller. All Wargames Foundry. Not the most colorful army, but tons of variety in quality of units. They need to make it out onto the table more often.
Austrian SYW - still need to add more of everything to this army, using Old Glory. My Prussians are currently limited to 4 units, so this period will require some work to get onto the table.
Late Roman: Another army purchased from Eric Miller. Wargames Foundry figures, waiting for rebasing to Pulse of Battle standards.
Roman Republican: Old Glory and Wargames Foundry. I love these guys. Lots of color, but a stolid straigh ahead no nonsense army. No messing around with namby pamby archers and light cavalry for these boys.
Macedonian/Successor: Old Glory and Wargames Foundry. I purchased the core of the army from Eric Miller (pike and cavalry) and have added to it. What a combination of tactical tools - pike, elephants, slingers, archers, heavy and medium cavalry, as well as a conglomeration of Gauls that I toss in as mercenaries/allies.
WW2 - 1944 - WestWind Germans and US. Lots of Shermans and PzkwIV's, infantry, MG's, mortars, AT guns. I really want to get back to some WW2 games
You should see what I still have to paint - both in the above and in new periods! But....that's a different post.....
Saturday, October 6, 2012
Update!
Despite my best intentions, it seems to have been a couple of weeks since my last update.
Quite possibly, its the altitude here in the Denver metro area that has befuddled me and left me off of my game. At least, that's a theory that Al Gore seems to believe in.
On the other hand....
Sometimes its just hard to muster the enthusiasm to blog when other projects are rolling along. Pulse of Battle is entering the final stages of final draft writing, prior to submission to my hardy band of editors. I've also been furiously painting Romans for PoB games (photo below).

Other than that, I've been doing a ton of reading on the Punic wars and the wars of the Successors. I'm drawn more and more to the Successor/Late Hellenistic era - quite the paper/rock/scissors of troop types and capabilities.
I've also been doing more and more in depth study of the Wars of the Roses, along with acquiring more books (!) on the era. The names and lineage of the key characters is slowly starting to sink in. You must forgive an American for confusion with all the names and titles!
I do find myself feeling that Richard III may have gotten the short end of the stick, so to speak, from the Tudor's PR machine. He's certainly and interesting character - I'm fascinated to see what comes of the archaeological dig purporting to have found his burial place.
On to the Broncos - Patriots game tomorrow! It is SOOOOOOO nice to have a REAL quarterback in a Broncos uniform again. Should be a great game, although I do believe that the Broncos have their work cut out for them.
That's all for now. I'll try to post more frequently.....
Sunday, September 23, 2012
Pulse of Battle Update
Hmmm. It appears that it has been a while since my last post. A couple of vacation trips, including our motorcycle vacation to the Black Hills, has been part of the cause for the blackout. Also - I've been using my writing time to instead focus on the writing of Pulse of Battle, the Field of Battle based ancients set of rules.
We played another set of test games last night - Republican Roman vs. Late Macedonian. The Romans won game 1, the Macedonians won game 2. Both games were played in one evening. Game 1 took 2 hours and game 2 took 1 1/2 hours. Both games came down to the wire, and were everything I'm looking for in a set - drama, tension, command decisions, and action. The games seem to have the balance of types and capabilities that I want, and ran smoothly. A handful of changes came up, but those were small tweaks.
At this point, the rules are written, and are in the "right before sending to editors" stage. With any luck, I can be "done" writing PoB in October/November.
A couple of photos from the game last night:
 A completely disordered Phalanx!
 Battle!

We played another set of test games last night - Republican Roman vs. Late Macedonian. The Romans won game 1, the Macedonians won game 2. Both games were played in one evening. Game 1 took 2 hours and game 2 took 1 1/2 hours. Both games came down to the wire, and were everything I'm looking for in a set - drama, tension, command decisions, and action. The games seem to have the balance of types and capabilities that I want, and ran smoothly. A handful of changes came up, but those were small tweaks.
At this point, the rules are written, and are in the "right before sending to editors" stage. With any luck, I can be "done" writing PoB in October/November.
A couple of photos from the game last night:


Saturday, July 21, 2012
Final Game in 1809 Campaign
This was game three in a three game 1809 French/Austrian Napoleonic campaign - played last Saturday night. The Austrians won a marginal victory in battle 1, the French had a crushing victory in battle 3, and the fate of the campaign hung in the balance for battle 3.
The French followed Marshal Rold's deployment to the "T". I think this created some initial opportunities for the Austrians as they exploited their superior deck and CiC (12+1) to set the tone and tempo of the battle. The Austrians closed on the French left, while holding their own right with a slim force of a brigade (Ed's) of Hungarian infantry and their 3 cavalry regiments.
Greg's Austrian assault at the hinge of the French line at the corner of the ridge near the French baseline succeeded in destroying half of the French artillery and creating a hole.....that couldn't be exploited. Greg's assault force was severely punished, and spent the rest of the game rolling to rally, it seemed. Meanwhile Chris closed with the largest Austrian infantry force on the far French left flank, and also deployed a grand battery on the ridge running across the width of the battlefield. Things looked bleak for Eric, the French commander of the French left.
General Shockey was perfecting the "ooze" assault method, as his strong force of French infantry and all the cavalry stumbled their way from the far French right to put pressure on Ed's troops. About this time, national Bavarian hero, John Mumby, launched an assault down the valley towards the remnants of Greg's assault force. This seemed to throw all kinds of kinks into the Austrian planning.
Chris methodically set about dismantling Eric's French - who gave as good as they got on the French left.
Ed launched his Hussars in a gallant attack down into the valley towards the Bavarian infantry's flank.....only to suffer a 3 UI loss from French and Bavarian artillery on the far ridge. So much for the Austrian cavalry trying anything aggressive from that point forward.
By this point, it looked like the Austrians had it in the bag. The French were down to their last couple of morale points, as Chris kept the pressure up on Eric's French.
Suddenly, out of the mist, from the land that time forgot - General Shockey's ooze assault burst onto the hill held by Ed's Hungarians. Before they could reach the Hungarians, the French surrendered their first chip to the Austrians!!!
The French hung on, not turning an Army Morale card, as Terry's assault mangled Ed's command.
At this point, the French were at 0 morale points, and the Austrians had 2!
Initiative to the French....first card - not an Army Morale card.
Next card.......Army Morale!!!!
Chris rolled the D12 for the Austrians and rolled an 8. OUCH.
Terry nervously picked up the D10 (for his CiC) and got ready to roll the test.....needing a 9 or 10 to continue, and possibly swing the morale points over to the French side.....he rolled an 8! Tieing the Austrian roll of 8, and ending the game!!!!
At this point, the Austrians won a marginal battle victory with 2 morale points left out of 24 at the game start. The French were at 0 out of 23 at the start.
So - for the campaign, the Austrians won 2 marginal victories, sandwiching the single crushing French victory.
The French started the campaign with 66 Campaign Points and ended with 12.
The Austrians started the campaign with 68 Campaign Points and ended with 3.
So - the Austrians won the battle count, but lost the campaign season due to the single crushing French victory!!!
We figured that the Austrians would happily quit the war and sign some meaningless treaty, while planning on renewing the war on the French at some future point. You've got to give the Austrians credit....they mastered the art of both quitting, and not quitting.
So - here are my overall thoughts on the campaign and the battle:
Campaign:
I'm happy with the battlefield selection process and the set up.
I really, really like the simplified post battle unit effect process, and REALLY like the post battle pursuit process. Simple and easy.
I kind of miss a campaign map, but I definitely didn't miss the work. Its enough work keeping the few records that were in this campaign.
As for the battle:
You're very optimistic if you hope to march a grand battery onto its position and deploy in time to do much of anything. The Austrians managed to, but had a great deck.
Don't roll a 1 for movement.
The Austrians never used their 12+1 CiC to help rally Greg's sole intact infantry unit and silenced artillery battery. I think the 1 in 12 odds of getting eliminated are offset by the much better chance of rallying with a D12+1 vs. a D8, and the addition of those 2 units in a healthy state would probably have forced John's Bavarians to think twice about coming down the valley.
Photos from the battle follow below:


Sunday, July 15, 2012
Final Little Bighorn Post
Sorry for the delay in getting this final post up for the LBH battlefield tour. Real life has a way of intruding on blogging...
I'd like to finish with just a couple of photos from the Benteen/Reno siege area, and sign off with some random thoughts about the battle.
First up:

 So much for controlling the high ground. This photo is from the northern end of Benteen's position, looking up and out toward Weir's Point. You can easily see how simple it was for the warriors to hunker down behind slopes and ridges and just pop off at the cavalry without exposing themselves.

View from weir's point toward Last Stand Hill (look toward the horizon, above the roadway, to the right of the area of trees around the visitor center). This is a photo zoomed in about 10X or so, giving an approximate perspective that Weir and others at this point would have had of the final stages of the battle on Last Stand Hill. Personally, I think any of their observations about seeing Indians doing this or that, or waving guidons, is entirely created after the fact based on what they found out after the battle. With dust from the battle, and the distances involved, I'm highly doubtful that they really saw much of anything that they could make out.
So - some random thoughts wrapping up my fantastic visit to the LBH battlefield.
1) If you ever get a change - GO! It is a great battlefield to visit, and very haunting. This is one of those battlefields that gives immediate enlightenment about the battle once you see the ground and visit the area. Highly, highly recommended.
2) Sheridan Wyoming as a short drive of about 60 miles to the battlefield. There are plenty of places to stay - we stayed in the new Hampton Inn and were very satisfied. I can't say much for the food in Sheridan, though. I spent almost $90 for a dinner for two (steak) at the "best" place in Sheridan, and the steaks tasted like mule hooves. Our second dinner in Sheridan was at Pizza Hut. Nothing fancy, and the place smelled slightly odd like all Pizza Huts, but the food was good and dinner cost $20.
3) I've read often comments like "if only Custer had taken the Gatling guns". Really? Really? How was he going to get them there? His pace would have been glacial, and he wouldn't have had a chance of catching up to the village. Additionally, the Indian warriors weren't stupid. They didn't fight like Zulus or Mahdists. Massed charges weren't a Plains Indian warriors "cup of tea", until they were certain that they would be successful. Let's assume that the Gatlings were there - most likely they would have been with Reno. OK, so what? I don't think he would have been dropping warriors like flies as they mindlessly charged the Gatlings. Most likely the warriors would have just spread out and enveloped the Gatlings and "boom", drop them where they stood. I really don't see much of an effect from the Gatlings on a highly dispersed target they would have been facing. These weren't WW1 Maxim guns, but Gatlings with a fairly fixed cone of fire.
4) Custer and his troops were exhausted on the day of the battle. I've ready many estimates that Custer might have only had an hour or two of sleep in 36 hours. I was up for 32 hours one time for work, and I can tell you - you're mind just doesn't work right. It takes much longer to make a decision, things don't sink in, and you almost feel numb. True, adrenalin would have kicked in for the troopers, but still - a bad, bad situation to put yourself into.
5) The distances on the battlefield were VAST. In my mind, the chief failure of Custer once he pitched in was to think there was ANY chance of Benteen making an appearance and affecting the battle. I'm not thinking about any person vendettas by Benteen slowing his approach, etc, but just the large distances involved and a simple time/motion study of how long it would take him to get to where Custer wanted him. It just wasn't going to happen.
6) I wonder if the 7th had been brigaded with an infantry regiment, or few infantry companies, possibly mounted, if things would have worked out differently. Indian warriors didn't like coming up against infantry ("long rifles") because of the long range of their weapons. An interesting "what if". I think the biggest issue is that the infantry would have slowed the column (see the Gatling discussion above).
7) In my opinion, Custer wasn't incompetent, and he wasn't an idiot. He was a fighter, and he finally got the target "cornered". He wanted to enhance his reputation, but he wasn't stupid enough to throw his life away on something he considered suicidal. I think the lack of battle preparation (rest, reconnaissance) led him to make some bad assumptions about the scope of what he was getting into. From the flow of the battle it looks like he was in tactical control until towards the end of the battle, looking for opportunities to dictate the tempo and flow of the battle. He just ran out of time and resources, and the final result was inevitable.
That's it!
I'd like to finish with just a couple of photos from the Benteen/Reno siege area, and sign off with some random thoughts about the battle.
First up:

Could it be Keogh's horse Comanche? No....just a free roving horse, looking for food from tourists on the path down to the Reno/Benteen siege site.


View from weir's point toward Last Stand Hill (look toward the horizon, above the roadway, to the right of the area of trees around the visitor center). This is a photo zoomed in about 10X or so, giving an approximate perspective that Weir and others at this point would have had of the final stages of the battle on Last Stand Hill. Personally, I think any of their observations about seeing Indians doing this or that, or waving guidons, is entirely created after the fact based on what they found out after the battle. With dust from the battle, and the distances involved, I'm highly doubtful that they really saw much of anything that they could make out.
So - some random thoughts wrapping up my fantastic visit to the LBH battlefield.
1) If you ever get a change - GO! It is a great battlefield to visit, and very haunting. This is one of those battlefields that gives immediate enlightenment about the battle once you see the ground and visit the area. Highly, highly recommended.
2) Sheridan Wyoming as a short drive of about 60 miles to the battlefield. There are plenty of places to stay - we stayed in the new Hampton Inn and were very satisfied. I can't say much for the food in Sheridan, though. I spent almost $90 for a dinner for two (steak) at the "best" place in Sheridan, and the steaks tasted like mule hooves. Our second dinner in Sheridan was at Pizza Hut. Nothing fancy, and the place smelled slightly odd like all Pizza Huts, but the food was good and dinner cost $20.
3) I've read often comments like "if only Custer had taken the Gatling guns". Really? Really? How was he going to get them there? His pace would have been glacial, and he wouldn't have had a chance of catching up to the village. Additionally, the Indian warriors weren't stupid. They didn't fight like Zulus or Mahdists. Massed charges weren't a Plains Indian warriors "cup of tea", until they were certain that they would be successful. Let's assume that the Gatlings were there - most likely they would have been with Reno. OK, so what? I don't think he would have been dropping warriors like flies as they mindlessly charged the Gatlings. Most likely the warriors would have just spread out and enveloped the Gatlings and "boom", drop them where they stood. I really don't see much of an effect from the Gatlings on a highly dispersed target they would have been facing. These weren't WW1 Maxim guns, but Gatlings with a fairly fixed cone of fire.
4) Custer and his troops were exhausted on the day of the battle. I've ready many estimates that Custer might have only had an hour or two of sleep in 36 hours. I was up for 32 hours one time for work, and I can tell you - you're mind just doesn't work right. It takes much longer to make a decision, things don't sink in, and you almost feel numb. True, adrenalin would have kicked in for the troopers, but still - a bad, bad situation to put yourself into.
5) The distances on the battlefield were VAST. In my mind, the chief failure of Custer once he pitched in was to think there was ANY chance of Benteen making an appearance and affecting the battle. I'm not thinking about any person vendettas by Benteen slowing his approach, etc, but just the large distances involved and a simple time/motion study of how long it would take him to get to where Custer wanted him. It just wasn't going to happen.
6) I wonder if the 7th had been brigaded with an infantry regiment, or few infantry companies, possibly mounted, if things would have worked out differently. Indian warriors didn't like coming up against infantry ("long rifles") because of the long range of their weapons. An interesting "what if". I think the biggest issue is that the infantry would have slowed the column (see the Gatling discussion above).
7) In my opinion, Custer wasn't incompetent, and he wasn't an idiot. He was a fighter, and he finally got the target "cornered". He wanted to enhance his reputation, but he wasn't stupid enough to throw his life away on something he considered suicidal. I think the lack of battle preparation (rest, reconnaissance) led him to make some bad assumptions about the scope of what he was getting into. From the flow of the battle it looks like he was in tactical control until towards the end of the battle, looking for opportunities to dictate the tempo and flow of the battle. He just ran out of time and resources, and the final result was inevitable.
That's it!
Tuesday, June 19, 2012
Last Stand Hill
Getting close to the end of posts on the LBH battlefield. In this post, I'll toss some photos of Last Stand Hill - easily the busiest of all locations on the battlefield. I'd guess that 95% of the visitors think the whole battle happened here....

Monument on Last Stand Hill. Little buckeroo courtesy of visiting tourists.
 No Talk at the summit of Last Stand Hill...just a wee bit sunburnt!
 The marker for the man himself, G.A. Custer.
 I have NO idea why I can't get this photo oriented correctly. Grrrr. Anyway, this is a look at the markers on Last Stand Hill. The visitor center and cemetary ar off to the right, in the area with trees. Obviously, this wasn't there at the battle....
 Another view in the same general area. The river is down the slope near the tree heavy area; the village was beyond the river. The distances involved are staggering - its a very eye opening experience to walk the battlefield after having only studied maps of the area.
Next time - the Reno/Benteen battlefield and random thoughts.

Monument on Last Stand Hill. Little buckeroo courtesy of visiting tourists.


Next time - the Reno/Benteen battlefield and random thoughts.
Thursday, June 14, 2012
More LBH Battlefield Photos - Deep Ravine

At some point, a substantial (40ish men) made for Deep Ravine. Was this an ordered attack by Custer to see if he could still break through to the village? Possibly hoping to link up with Reno, who "should" have been across the river pressuring the village? Was Custer dead at this point? Was the exodus to Deep Ravine a last desparate attempt to escape the slaughter? Common sense tells me that doesn't make sense....after all....why would you "escape" towards the village and the heaviest mass of warriors?
Anyway, some photos:


Runs-Her-Man on the Deep Ravine trail, looking toward Last Stand Hill.


Looking up the trail created down to Deep Ravine. Various markers dot the landscape as you look up to Last Stand Hill. Consider the isolation and sense of helplessness that troopers might have had if they found themselves in this position on that hot June afternoon.

Next time I'll add some photos of Last Stand Hill. I'll finish off with a couple of posts about Weir Point, and the Reno/Benteen battle area.
Wednesday, June 6, 2012
Calhoun's Hill
After failing to force a ford at Medicine Tail Ford, Custer's battalions came under increasing pressure from warriors starting to flood across the LBH river. The Troops fell back uphill onto the southern end of Greasy Grass ridge, generally aligning around/near the knoll that would become known as Calhoun's Hill.
This portion of the battle tends to be more confusing to me, as the only eyewitnesses were either the Indian scout Curley (who observed some of this action before skedaddling) or the Indian warriors themselves.
In general, I believe the battalion made its way to higher ground, with Calhoun's L Troop generally facing to the rear in the direction the Battalion had just come from. In effect, they were the rearguard of the Battalion, as the other Troops faced southeastward toward the river. Calhoun's L Troop appears to have been on higher ground, with other Troops deployed on lower ground toward the mass of warriors coming up from the river. Calhoun's L Troop seems to have been a rock of resistance, and stood their ground for some time. On the reverse slope of Calhoun's Hill (in general locational terms), Keogh's I Troop was placed as a reserve in waiting. At some point, Calhoun was overwhelmed by the volume of fire from the dismounted warriors, with a handful of survivors fleeing up Greasy Grass Ridge toward Custer's location near/at "last stand hill". Tom Custer's C Troop may have been somewhere between Calhoun's Hill and the warriors coming up from the LBH river, at some point moving on the lower slopes of the Greasy Grass Ridge to joing back up with GA Custer and the command element, along with F and E Troops.
I don't think that Keogh's I Troop put up too long of a resistance. I believe that after Calhoun was swamped, the attacking warriors swept over the hill and took I Troop in a hurry. The cluster of fallen markers for I troop doesn't look too much like an organized position to me, nor are they in a position that anyone would choose as a good defensive position.
Anyway, on to the photos!
 A view from the approximate middle of Calhoun's position on Calhoun's Hill, looking up the ridge toward Custer's final position on "Last Stand Hill". You can see the monument on the knoll in the distance. The warrior's primary attack would have come up from behind the camera and to the left of the camera. Keogh's I Troop would have been off to the right corner down hill from L Troop. C Troop would have been downhill and to the left.
 A view towards Keogh's I Troop. The markers for the fallen troopers are in the distance - look up from "Crazy" on the plaque.
 A closer view of the markers. Note the handful of markers towards the left of the photo. I believe these would have been a handful of troopers either trying to escape towards Custer on Last Stand Hill, or possibly a small element dispatched by Calhoun or Keogh to make contact with Custer, before the end came for their Troops.
This portion of the battle tends to be more confusing to me, as the only eyewitnesses were either the Indian scout Curley (who observed some of this action before skedaddling) or the Indian warriors themselves.
In general, I believe the battalion made its way to higher ground, with Calhoun's L Troop generally facing to the rear in the direction the Battalion had just come from. In effect, they were the rearguard of the Battalion, as the other Troops faced southeastward toward the river. Calhoun's L Troop appears to have been on higher ground, with other Troops deployed on lower ground toward the mass of warriors coming up from the river. Calhoun's L Troop seems to have been a rock of resistance, and stood their ground for some time. On the reverse slope of Calhoun's Hill (in general locational terms), Keogh's I Troop was placed as a reserve in waiting. At some point, Calhoun was overwhelmed by the volume of fire from the dismounted warriors, with a handful of survivors fleeing up Greasy Grass Ridge toward Custer's location near/at "last stand hill". Tom Custer's C Troop may have been somewhere between Calhoun's Hill and the warriors coming up from the LBH river, at some point moving on the lower slopes of the Greasy Grass Ridge to joing back up with GA Custer and the command element, along with F and E Troops.
I don't think that Keogh's I Troop put up too long of a resistance. I believe that after Calhoun was swamped, the attacking warriors swept over the hill and took I Troop in a hurry. The cluster of fallen markers for I troop doesn't look too much like an organized position to me, nor are they in a position that anyone would choose as a good defensive position.
Anyway, on to the photos!


Tuesday, June 5, 2012
On to Medicine Tail Coulee and Medicine Tail Ford
So, continuing my battlefield photo tour...
While Reno's attack started down the valley, Custer and his battalion (Command element, C, E, F, I, and L troops) moved to their right (to the North, heading west in Medicine Tail Coulee) to gain a position to attack the (they hoped) rear of the village.
 This photo shows Medicine Tail Coulee. Custer's battalion moved from right to left.
 Another photo of Medicine Tail Coulee.
As Medicine Tail Coulee opened up as it opened to the LBH river, Custer broke up E troop into its two constituent platoons. The first platoon, E troop (under Smith) was originally diverted a bit to the North in the coulee to drive off a small group of warriors. 2nd platoon, E troop (under a very new Lt. Sturgis) was directed toward the Medicine Tail Ford. Sturgis stopped a couple of times as his command (only around 20 men) neared the ford. It seems obvious to me that Sturgis was a little taken aback by what he was hearing in the direction of Reno's fight, and as he neared the ford it was obvious that he was nowhere near the end of the village. But, orders being orders, he eventually started to cross at the ford. It seems around 15 to 20 warriors had gathered on the village side of the ford, and started firing as 2nd platoon started to cross. One of the first to get hit was Sturgis, and warrior accounts seemed to focus on another leader also getting hit (the platoon sgt?). At this point, the remaining troopers gathered the wounded/dead and fell back. This is surely evidence that Custer was still dictating the flow of the battle, and retained command initiative. E troop's "assault" was clearly an attempt to determine the extent of the village. If successful, I have no doubt that Custer would have pitched in with the rest of his command. From his remaining troop's position in the Coulee, Custer would have been observing the failure of Sturgis' attack. I think this lead to his decision to continue up the ridge and find the extent of the village and find the next best place to attack.


While Reno's attack started down the valley, Custer and his battalion (Command element, C, E, F, I, and L troops) moved to their right (to the North, heading west in Medicine Tail Coulee) to gain a position to attack the (they hoped) rear of the village.


As Medicine Tail Coulee opened up as it opened to the LBH river, Custer broke up E troop into its two constituent platoons. The first platoon, E troop (under Smith) was originally diverted a bit to the North in the coulee to drive off a small group of warriors. 2nd platoon, E troop (under a very new Lt. Sturgis) was directed toward the Medicine Tail Ford. Sturgis stopped a couple of times as his command (only around 20 men) neared the ford. It seems obvious to me that Sturgis was a little taken aback by what he was hearing in the direction of Reno's fight, and as he neared the ford it was obvious that he was nowhere near the end of the village. But, orders being orders, he eventually started to cross at the ford. It seems around 15 to 20 warriors had gathered on the village side of the ford, and started firing as 2nd platoon started to cross. One of the first to get hit was Sturgis, and warrior accounts seemed to focus on another leader also getting hit (the platoon sgt?). At this point, the remaining troopers gathered the wounded/dead and fell back. This is surely evidence that Custer was still dictating the flow of the battle, and retained command initiative. E troop's "assault" was clearly an attempt to determine the extent of the village. If successful, I have no doubt that Custer would have pitched in with the rest of his command. From his remaining troop's position in the Coulee, Custer would have been observing the failure of Sturgis' attack. I think this lead to his decision to continue up the ridge and find the extent of the village and find the next best place to attack.

A view towards the LBH river, and Medicine Tail Ford. E troop, 2nd platoon, would have approached the ford directly away from the viewer's perspective. Custer would have been located a bit further back (behind this marker), observing the flow of battle.

Another view.

A zoomed in shot towards Medicine Tail Ford. E troop, 2nd platoon approached the river through here, attempted to cross, and fell into disorder and confusion when its command element was eliminated. After some inconclusive skirmishing from 2nd platoon and 1st platoon (which moved toward the ford for support), action here faded away as the reconstitued E troop moved back toward the rest of the battalion.
Next post: We continue with the battalion as it makes its way up and along the ridge.
I should point out that the battle "narrative" is my interpretation, based on reading, but more importantly what my eyes told me looking at the ground. I make no claims for consistency with any single source, nor do I claim ultimate accuracy. Most of this just seems like common sense.....to me!
Monday, June 4, 2012
Little BigHorn Battlefield Visit - Reno in the Valley
Arriving at the LBH battlefield for the first time is odd...you're driving up I90 without realizing that you are in fact driving right through where Reno's dismounted skirmish line was deployed, and right in the vicinity of the huge pony herd and village area.
 Reno's battalion swept down the valley from the left, dismounting at the area of the present red roofed buildings in the upper right of the photo. The buildings are immediately to the east side of I90. The photo is taken from the bluffs to the east of the river.
 Another view of Reno's position from a slightly different position. Trace along the line of I90 until you see the red roofed building, and that's Reno's dismounted skirmish line position. The tree area to the east of that (closer to your viewing perspective) is the wooded area adjacent to the river that he fell back to as the pressure mounted from the Indian warrior's assault.
 Another, wider angle, shot from a different angle. Again - look for the red roof building to locate the skirmish line position.

After "charging" down the valley, dismounting to a skirmish line, and then falling back into the woods, the next phase was a generally panic stricken rush to "get out of Dodge" and get over the river and up onto the bluffs....to perceived "safety". Not one of Reno's finer moments....
 You can see the flat area on this side of the river that Reno's fleeing troopers crossed over to, and the rugged ravines that they faced as they ascended to "safety".
 A closer look at the area.
 A closer view of the hills, folds, and ravines that the troopers fled up to get to the bluffs. Hard to recreate this terrain on a wargame battlefield.
One can only imagine the sheer terror the troopers felt - a frontal assault gone bad, seemingly hordes of warriors boiling out of the village, the redeployment into the wooded area and then the panic stricken rout to the river. If they managed to survive that far, they then had to get across the river and up to the top of the bluffs. It's easy to see why Reno's battalion was effectively spent and ineffective after this experience.
More in the next post as I follow the battle flow through photos.


A zoomed in photo of the red roofed buildings where the skirmish line was located. Sorry for the slightly fuzzy focus....zoomed in and a windy day.
After "charging" down the valley, dismounting to a skirmish line, and then falling back into the woods, the next phase was a generally panic stricken rush to "get out of Dodge" and get over the river and up onto the bluffs....to perceived "safety". Not one of Reno's finer moments....


One can only imagine the sheer terror the troopers felt - a frontal assault gone bad, seemingly hordes of warriors boiling out of the village, the redeployment into the wooded area and then the panic stricken rout to the river. If they managed to survive that far, they then had to get across the river and up to the top of the bluffs. It's easy to see why Reno's battalion was effectively spent and ineffective after this experience.
More in the next post as I follow the battle flow through photos.
Sunday, June 3, 2012
Plains Indian Wars Battlefield Visits
Just back from a long weekend visit to the Little Bighorn battlefield (aka "Custer's Last Stand"), the Fetterman fight (massacre?), Wagon Box Fight, and Ft. Phil Kearney, along with my trusty sidekick and wife - Lisa.
All I can say is "wow". I regret that I haven't made it to these sites before. Even with a lifelong interest in the Batle of the Little Bighorn, and fully aware in my mind of the distances involved, it was stunning to see the vast distances and space of the LBH battlefield. I'll expand on my opinion of the battle in a future post, but all I can say is - if you haven't gone, you really need to go.
The Fetterman fight battlefield was similar. Vast spaces, windswept hills.
In both cases, the slope of the hills and rugged nature of the ground was eye opening.
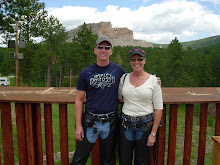
My wife and I decided we needed Native American ("Indian") names in honor of our visit, so we decided on:
Brent: No Talk
Lisa: Runs-Her-Man
Here are a couple of photos of No Talk and Runs-Her-Man at the Fetterman fight battlefield.


All I can say is "wow". I regret that I haven't made it to these sites before. Even with a lifelong interest in the Batle of the Little Bighorn, and fully aware in my mind of the distances involved, it was stunning to see the vast distances and space of the LBH battlefield. I'll expand on my opinion of the battle in a future post, but all I can say is - if you haven't gone, you really need to go.
The Fetterman fight battlefield was similar. Vast spaces, windswept hills.
In both cases, the slope of the hills and rugged nature of the ground was eye opening.
My wife and I decided we needed Native American ("Indian") names in honor of our visit, so we decided on:
Brent: No Talk
Lisa: Runs-Her-Man
Here are a couple of photos of No Talk and Runs-Her-Man at the Fetterman fight battlefield.

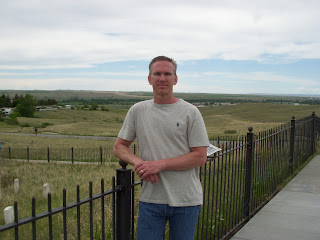
No Talk posing on the ridge at the Fetterman battlefield. Monument in the right distance.

Runs-Her-Man on the ridge, with the valley and hills behind where the Lakota lay in wait for the Fetterman detail.
Saturday, May 26, 2012
Lee's Lieutenants and More Cleanup!
During my sorting and sifting process, I came upon a first edition set of Lee's Lieutenants, by DS Freeman. Unfortunately, its not a signed copy....but then if it was, I wouldn't be offering it for sale! If anyone out there reading this is interested in a mint copy of a 3 volume, 1st edition of Lee's Lts, you can get in touch with me via this blog, or email me directly at brentoman@q.com .
I don't want to give the impression of a vast disorganized mess that I'm working through....rather its a compactly stored area of 15 years worth of various books, project materials, and miscellaneous "stuff" that a wargamer accumulates. Which wargamer's then forget they have, and when they come across it they think "I'll do that someday". Well, I've discovered from my half century on this planet, that "someday" never comes unless you make it so.
Hex terrain.....gone! Various paperback novels, read and unread ....gone! A couple of boxes of old wargame rules.....gone! I'm investigating CD/pdf versions of my Wargames Illustrated and other magazines to save space. I truly enjoy the feel of a magazine vs. reading on a monitor, but lets face it - its virtually impossible to find an old article, which then means that old magazines are little more than space taking objects.
I did find that I most likely have more ECW figures (Old Glory and Redoubt) than I could ever possibly use! That, and enough 1/60th WW2 armor to field multiple armored divisions in FoB:WW2!
The plan is to get all the unpainted lead neatly organized in plastic storage boxes under my game table (enclosed). Finished terrain pieces and terrain project materials will be moved to my storage closet. After that, time to work on adding more shelving in my figure cabinets, and time to build more figure storage trays. Time flies when you're having fun!
In the meantime, I'm up at 4 AM every day, using the first 50 minutes of my day for uninterrupted and dedicated painting. Since I started this around 100 days ago, my output has been startling - I LOVE knowing exactly when I'll be painting. Hit the painting table, turn on ESPN2 and listen to Mike and Mike go over the previous night's sports results while laying on some new color. Very cool, very relaxing, and for me - the perfect way to enjoy my hobby and make progress on my armies.
As part of the cleanup, I ran across some old Historicon and Cold Wars Photos, taken with my (now gone) trusty Sony Mavica - the height of digital camera technology at the time. I think the two photos below were from a game at Cold Wars in 2003. Recognize anyone?

I spy..one of Piquet Inc.'s owners!

Could that be Freddie? Jeff? Serf #1?
Subscribe to:
Posts (Atom)