I'm getting back to working on "Pulse of Battle", the upcoming FoB based Ancient/Medieval game. I always try to immerse myself in reading of the period(s) when I'm working on rules - just gets me in the mood, as well as helping to pick up bits and pieces of detail.
I'm currently reading "Fatal Colours" by George Goodwin, dealing with the background of the WotR, up to the battle of Towton 1461 I'm about 1/2 through it, and it is a fascinating and well done book. This is the first time I've spent too much effort looking at the background of the conflict, and it is certainly convoluted. With motives seemingly focused on attaining power, influence, revenge....its almost more like a gang or mafia story!
I wonder - why haven't there been any recent movies or mini-series about the WotR? It would seem tailor made for an extended series - think of the personalities, the back stabbing, the intrigue and plotting, the battles. Wow! Come on HBO!
Anybody out there have a favorite movie or book about the WotR? Any favorite personalities?
Below: A command stand for my WotR armies in progress....
Saturday, March 31, 2012
Thursday, March 29, 2012
Terrain Tile Basics
OK - some basic stuff about my 1 foot square terrain tiles.
My intent isn't for landscaped squares, but rather a changeable system of pieces. Instead of sculpted hills, my hills are contoured sections that create hill edges, that can be wrapped back around themselves to create hills, left "open" to creat long ridgelines, penetrating hill edges onto the table, etc.
The basis for all the terrain squares are 1 foot square vinyl tile, 1/8" thick. Mine are made by Armstrong, and cost around $.70 to $.80 per tile. Tile is a wonderful choice for terrain that lays flat. It doesn't warp when you paint or finish it, and it doesn't dimple or get damaged when players lean on it or place their hands on it during a game. We've played about a years worth of games on my terrain, and the squares look just as good as new.
I double up the squares, so each 1 square foot section consists of 2 tiles, glued back to back to each other. These are the basic squares, that form the basis for the baseboard terrain. To glue the tiles together, I needed glue that was a consistent thickness and consistency so that the terrain pieces were of equal thickness. I use thick, gap filling cyanoacrylate clue ("super glue") to glue the pieces together. I apply a nice bead of glue around the perimeter of the bottom piece, and "swirl" so glue around the middle to make sure there is even distribution of glue to hold the tiles together. Place the top tile on the bottom and make sure the opposite corners line up - just use your thumb and forefinger and "pinch" at each corner. Your sense of touch is more than accurate enough to get the pieces lined up.
I'll post later about making rivers and roads and hill sections. Its all about the same, but there are some tricks.
As for a rock hard durable finish - its pretty simple. I use a cheapo gallon of latex interior wall paint that I bought at Home Depot. Pick the color you want for your base - be aware that the tone and some of the color will be visible. Mine is kind of a pumpkin/brown color.
I use a 4" wide paint roller, and just roll the paint onto the top of the 2 tile terrain section like I'm painting a wall. Make sure its totally and evenly covered, and wipe off any excess that slops over the edge.
While the paint is still wet, apply the covering flock. I use a variety of Woodland Scenics colors - green, turf, blended turf, yellow grass, earth, etc. I have a large plastic storage box that I use to put the flock into my high tech flock dispenser utility device (HTFDUD). Normal people would recognize it as a squeeze flour sifter, but to a wargamer its the perfect means of evenly applying flock to freshly painted terrain. To a wargamer, its a HTFDUD.
Anyway, pour the flock color, or colors into the sifter. Sift the flock over the tile where you want that color. You can get a natural variation in the grass color on the tile by first applying a shade in some areas on the tile, then putting a different shade over more areas, blending them together with different shades. Its much easier than it sounds.
Let the tiles that are now flocked set over night so the paint dries. Next day, tip the tiles on their side and blow off the extra loose flock.
Now its time to apply the HTWSSaDC (High Tech Wargame Surface Sealer and Durability Coating). I buy mine at Home Depot (aka Wargamers Depot). Don't look for HTWSSaDC, but rather you want to buy a gallon of Minwax water based Polycrylic - a clear protective finish. I use clear satin.
Again, you'll apply this clear finish using a 4" roller. (I hope I don't need to tell you that you need a paint pan to put the paint into to use the roller....). Go for an even, but fairly thick coat of the clear finish. It will darken and mute the flock colors, and tie the whole mess together. Let sit over night, and ZOWIE, you have virtually indestructable terrain squares. If you ever do have damage, just hit them with some clear, add flock, and then clear again once that flock has dried.
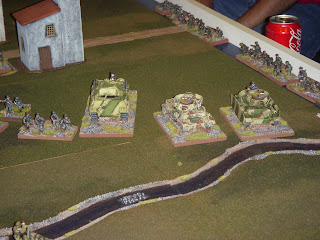
Some random photos of the terrain:
Oops....that's not terrain....that's Toby!
Saturday, March 24, 2012
Book Review: Cain at Gettysburg
Every once in a while, you read a book where you just hate that you finished the last page. "Cain at Gettysburg", by Ralph Peters, was that type of book for me.
Wow. Great book! Peters, a retired US Army officer and bestselling author, has hit a home run with CaG.
Don't think this is "Killer Angels". CaG is far grittier, and less heroic in tone. Where KA emphasized the 20th Maine and Chamberlain, in CaG they aren't even mentioned. I found it fascinating to follow the different historical characters that Peters chose to use to tell the story. The fictional characters were a bit more uneven, but taken as a whole, very well done.
Peters' battle narratives are chilling and forceful page turners.
If you have ANY interest in the Battle of Gettysburg, you owe it to yourself to read this book.
http://www.amazon.com/Cain-at-Gettysburg-Ralph-Peters/dp/0765330474/ref=sr_1_1?ie=UTF8&qid=1332633661&sr=8-1
Quoting from the final pages of Author's Notes:
"It demeans the heroes of Gettysburg to depict them as flawless saints. Not one was cut from marble in the womb. Imperfect men fought an imperfect battle and so preserved "a more perfect union" for all. Heroes are men who overcome themselves".
Sunday, March 18, 2012
Game 2 of Peninsula Campaign
We played game 2 of 3 in our Peninsular campaign last night - a hard fought French victory. The battlefield was unusual in that a Class II river wound through the middle of the table. The British decided to agressively position the bulk of their army on the French side of the river, defending the thin band of woods along the river. The British were surprised when the French opted for the massed assault in the center. I may be wrong, but I think the British were hoping the French would elect to attack either flank, which would give them the freedom to move out of their center position and flank the anticipated French assault. The French roughly handled the British artillery and punched a hole through the defensive line, clear to the river. A single Portuguese infantry regiment managed to stem the tide and most likely kept the battle from being a crushing French victory. While the assault was going in on the center, the British and French fought a bitter struggle in the woods on the flank. The British/Allied army suffered heavier losses, and ended up failing their first Army Morale test. Great game, great friends - great time!
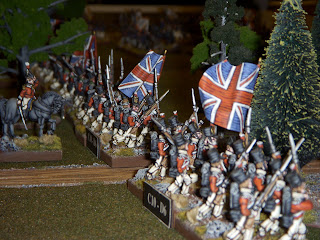
Some photos from the game action:
French command ponders a tactical dilemma.....
Some photos from the game action:
French command ponders a tactical dilemma.....
General Shockey leaps into action with his cavalry on the British left flank
Saturday, March 3, 2012
The Long Search
I've been gaming since I was 12 years old. Since the beginning, I've tried many many different terrain techniques and methods. Starting at the beginning and working through the list:
Painted green pingpong table with lichen/twig trees, fabric roads, ceiling tile hills (UGLY)
Felt covering (UGLY)
Ceiling Tile modular squares for 1/285th armor (Brittle, limited set up)
Styrofoam modular squares (Messy to make, easily damaged. Blch)
Particle board hexes (about 8" across, all cut by hand on power mitre box. Great flexibility, even being very particular, there were inevitably large gaps on the board. Almost impossible to have exactly the "right" piece when coming up with layouts. I still have several large boxes of these...can't bear to throw them away).
Flocked indoor/outdoor carpet (very durable, but I learned to detest "plop on" rivers and roads. I just can't stand seeing rivers and roads sliding all over during the course of game play).
Felt over hills, loose flock (VERY messy. Had too much of a skirmish game feel to me - in my opinion, everything else in a miniature wargame is scaled down, and this terrain was too much 1:1 type scale. Flock got EVERYWHERE. This one was short lived!)
And finally - my ultimate system - 12" squares made from 1/8" thick floor tiles. This stuff is really great to use - you cut it by scoring and snapping, it doesn't warp. With the finish technique that I developed, its very hard wearing and durable. I'll start posting "how I did it" posts this week. It gives me the flexibility to do virtually any terrain combination or arrangement that I want. I'll post how I make the basic squares, hill sections, river and road sections.
With that said - here's some more photos of the last game we played:
Subscribe to:
Posts (Atom)


